how to install tape in hair extensions
Introduction to Tape In Hair Extensions
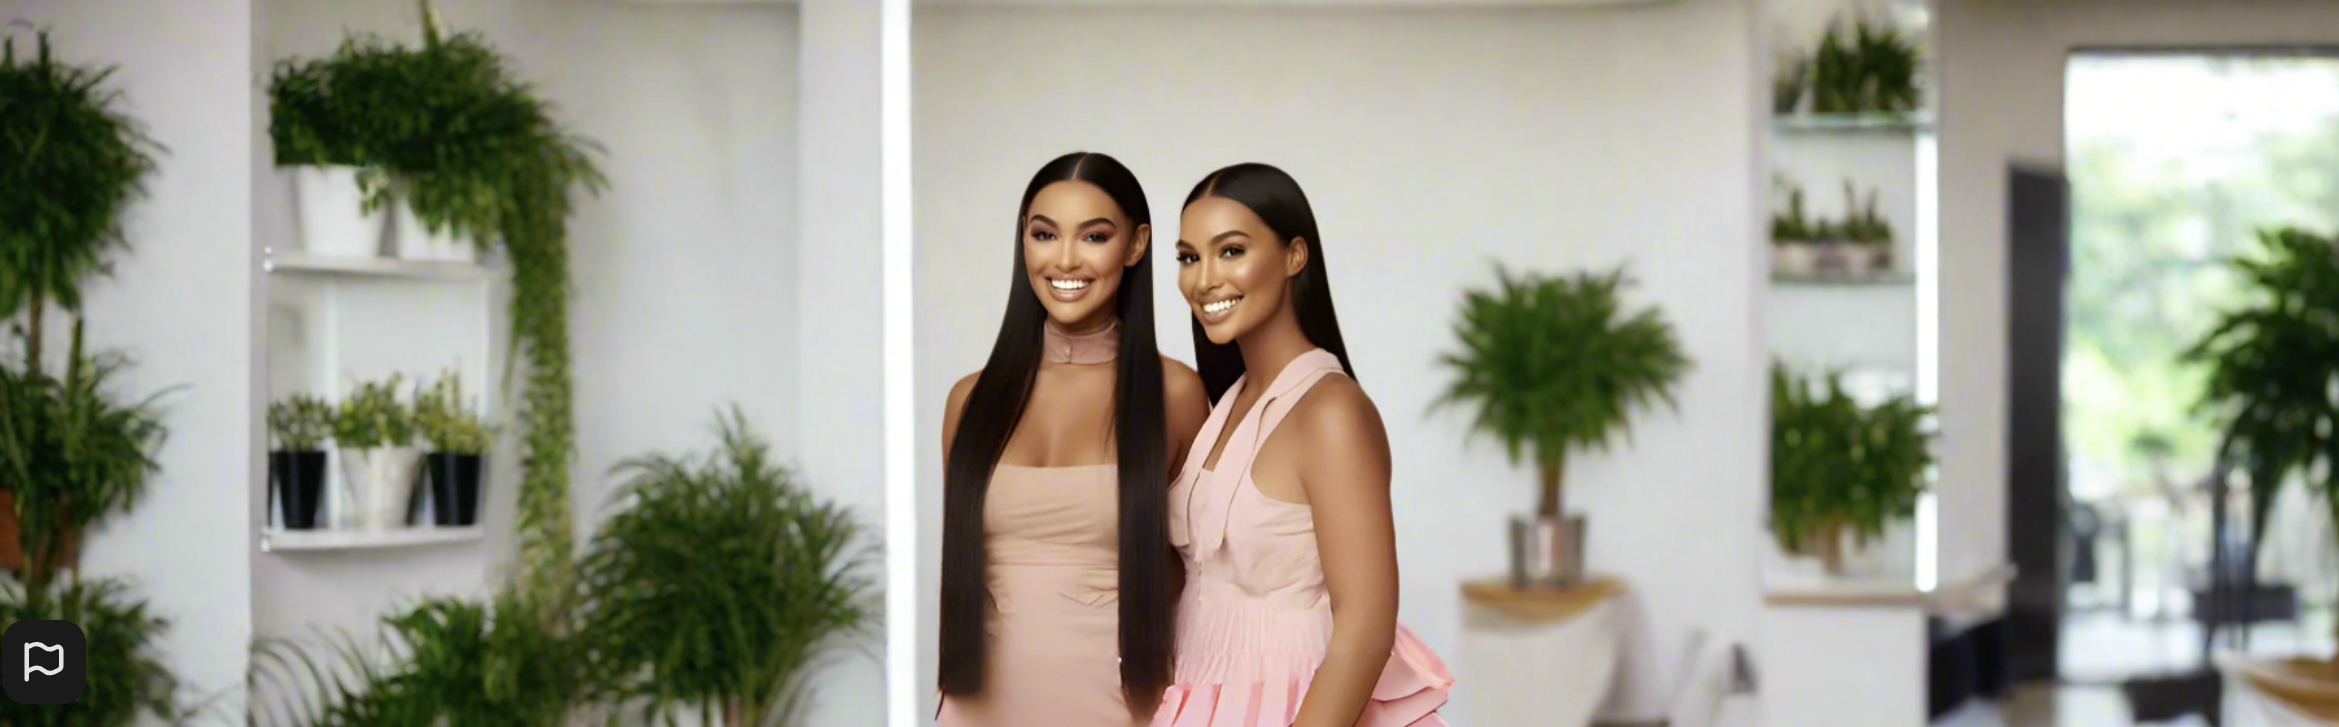
What Are Tape In Hair Extensions?
Tape in hair extensions are slim, pre-taped pieces of hair that you attach close to the roots of your natural strands. They come as small wefts with a sticky, double-sided adhesive tape on one side that bonds to your hair. This method of hair enhancement is popular because it's lightweight, blendable, and less damaging than other types of extensions. When applied properly, tape in extensions offer a seamless appearance, making it hard to tell where your natural hair ends and the extensions begin.
Benefits of Choosing Tape In Hair Extensions
Tape in hair extensions offer a range of benefits making them a popular choice for those looking to enhance their hairstyle. Firstly, they provide a seamless look as they lay flat against the head, virtually undetectable to the naked eye. This creates a natural blend with your own hair. Moreover, they are lightweight and comfortable to wear, reducing strain on your scalp compared to other extension types. The application process is relatively quick and easy, which can usually be completed in under an hour, saving time and effort. Importantly, they don't require heat for installation, which helps to minimize potential damage to your natural hair. Additionally, tape in extensions are reusable; with proper care, they can be re-taped and applied multiple times, offering long-term value. Lastly, they work with almost any hair type and offer versatility in styling, granting the freedom to experiment with length, volume, and even color highlights without permanent change.
Preparing for Installation
Choosing the Right Extensions
To ensure the best results with tape hair extensions, selecting the right type is essential. Start by matching the extensions to your natural hair color for a seamless blend. Consider the length and texture as well, choosing options that mimic your own locks to enhance the natural look. It's important to select high-quality extensions made of real human hair if you desire a more natural appearance and the flexibility to style with heat tools. Synthetic extensions may offer a budget-friendly alternative but keep in mind that they often have limitations when it comes to styling and durability. You should also think about the weight of the extensions. Too heavy and they could strain your natural hair; too light and they may not achieve the desired effect. It’s recommended to consult with a professional hairstylist to help make the best choice for your hair type and the look you want to achieve.
Tools and Materials Needed
Before you begin the process of installing tape in hair extensions, it's essential to gather all the necessary tools and materials to ensure a smooth and successful application. First, you'll need a good quality adhesive tape specifically designed for hair extensions. This tape ensures they will attach securely and last longer. A set of hair clips will help you section off your hair with ease. You'll also need a tail comb for precise parting and a pair of scissors for any trimming that might be required. Don't forget to have a mirror handy to check the placement as you go. Additionally, having a flat iron on hand may be useful for pressing the tapes firmly in place, although this is optional depending on your installation method. Lastly, a good idea is to keep a detangling brush and alcohol swabs for cleaning the scalp before applying the extensions. Gather these items together before you start, and you'll be ready to create a beautiful, transformed look with your tape in hair extensions.
Preparing Your Natural Hair
Before installing tape-in hair extensions, it's essential to ensure that your natural hair is ready. Start with freshly washed and thoroughly dried hair, as clean hair allows the extensions to adhere properly. Avoid using any conditioners or oils, since they can prevent the tape from sticking. Detangle your hair carefully from ends to roots to minimize any snags during installation. If you have fine or slick hair, you might want to slightly tease the roots where you will apply the tape-ins. This provides a firmer base and can help secure the extensions in place. Remember, the goal is to create an optimal environment for the tape to adhere, ensuring a smooth and successful installation process.
Step-by-Step Installation Guide
Sectioning the Hair
Before applying your tape in hair extensions, it's crucial to section your natural hair properly. Start by creating a horizontal parting from the middle of one ear to the other. Clip the hair above the parting out of the way. This will give you a clean working area and ensure the extensions are applied evenly. Work in small sections to keep the application manageable and prevent tangling. Leave enough space at the roots to allow for natural movement and avoid placing the extensions too close to the edges to prevent visibility. Sectioning your hair correctly is the foundation for achieving a seamless and natural-looking finish with your tape in extensions.
Applying the Tape In Extensions
To apply tape in hair extensions correctly, begin by peeling off the backing from one tape strip. Position this strip underneath a small section of your natural hair, about a quarter inch from the roots. Apply gentle pressure to secure the tape to your hair. Take a second tape strip and align it directly on top of the first, sandwiching your natural hair in between. Press firmly to ensure a strong bond. Avoid touching the adhesive with your fingers to maintain its grip. Repeat this process throughout the desired areas of your head, making sure to leave enough space between the extensions to allow for natural hair movement and styling flexibility. Remember, proper application is crucial to prevent slippage and to ensure a seamless look.
Techniques for Natural-Looking Placement
Achieving a natural look with tape in hair extensions requires a combination of precision and technique. When placing the extensions, aim for a staggered arrangement rather than in straight rows, which mimics natural hair growth. Start by selecting thin strands of hair; they should be lightly teased at the roots to provide a stable base for the adhesive. Keep the extensions about a quarter-inch away from the scalp to allow for movement and to avoid tension. It's important to align the extensions parallel to the hair's natural fall. After affixing the first piece, add the second piece directly on top to 'sandwich' the natural hair between the tapes. Blending is crucial; ensure that the extensions are not visible by carefully checking and readjusting if needed. A mirror can be helpful to check the back of your head or, better yet, get assistance to ensure a flawless finish. Remember to avoid placing extensions too close to the hairline or parting lines to maintain the illusion of natural hair.
Ensuring Comfort and Durability
Tips for a Comfortable Fit
Achieving a comfortable fit with tape-in hair extensions is essential for your satisfaction and the health of your natural hair. Here are some tips to ensure that your tape-in extensions feel as natural as possible:
- Choose the Right Size: Make sure that the extensions match the thickness of your natural hair. Too thick or wide might feel heavy and cause discomfort.
- Proper Placement: Apply the extensions close to the roots but not directly on the scalp to avoid irritation.
- Avoid Overloading: Do not apply too many extensions in one area; distribute them evenly to maintain comfort and reduce tension on the scalp.
- Use a Soft Tease: Before applying the tape, gently tease a small section of your natural hair at the roots to give the extensions a more secure grip while avoiding any pulling sensation.
- Ensure Correct Alignment: Align the tapes neatly and press firmly for a secure hold that doesn't pinch or tug the hair.
- Test the Movement: Once applied, gently move your head around to make sure there's no pulling or discomfort.
Following these tips will help you ensure that your tape-in hair extensions are comfortable to wear and remain in good condition for as long as possible.
How To Ensure Long-Lasting Hold
Ensuring that your tape hair extensions have a long-lasting hold is crucial for maintaining a natural look and reducing the frequency of adjustments. Here are several key steps to help guarantee that your extensions stay secure for as long as possible:
- Choose High-Quality Tape: Invest in premium adhesive tape that's designed specifically for hair extensions. This ensures a stronger bond with your natural hair.
- Apply on Clean Hair: Make sure your hair is free of oils and conditioners before installation. This will help the tape adhere firmly.
- Press Firmly: After placing the tape extension onto your hair, press firmly to create a secure seal. You can use a flat iron for a few seconds to reinforce the bond.
- Avoid Immediate Washing: Wait at least 48 hours before washing your hair after the installation. This allows the adhesive to set properly.
- Use Extension-Friendly Products: When you do wash your hair, use mild shampoos and conditioners that are free of oils and alcohols to prevent breaking down the adhesive.
- Regular Maintenance Checks: Schedule regular appointments to check the condition of your extensions and adhesive. Quick fixes can prevent future issues with the bond strength.
By following these steps, you can enjoy beautiful, durable tape-in hair extensions that blend seamlessly with your natural hair.
Styling After Installation
Cutting and Blending Extensions
Once the tape in hair extensions are installed, a key step is to make them look as natural as possible. This is where cutting and blending come into play. Here is a simple guide to help you blend your tape in extensions seamlessly with your natural hair:
- Start with Dry Hair: Ensure your extensions and natural hair are completely dry. Cutting wet hair can lead to uneven lengths once dry.
- Use the Right Scissors: Invest in a pair of sharp scissors specifically designed for cutting hair to get a clean, precise cut.
- Cut in Layers: Instead of cutting straight across, create layers by cutting at an angle. This will give a more natural, feathered look.
- Blend Gradually: Trim the extensions little by little, blending them into the layers of your natural hair. It is better to cut less and then trim more if needed.
- Check the Balance: Frequently step back and check from different angles to ensure the extensions are evenly blended.
- Seek Professional Help: If unsure, it's best to visit a stylist who can cut and blend the extensions professionally.
Following these steps will help your tape in extensions to appear as a natural extension of your own hair, creating a seamless blend that's both beautiful and believable.
Styling Tips for Taped Hair
Once your tape-in hair extensions are installed, creating a seamless and natural look with your own hair is essential. Here are some styling tips to help maintain the beauty of your taped hair:
- Use Heat Protectant: Always apply a heat protectant before using hot tools to prevent damage to both your extensions and natural hair.
- Gentle Brushing: Use a soft-bristle brush or a special extension brush to detangle gently, starting from the ends and working up to the roots. Avoid pulling or tugging.
- Avoid Direct Heat: When using styling tools, keep them away from the tape bonds to prevent weakening the adhesive.
- Blow-Drying: When blow-drying, use a low heat setting and dry from the top down to smooth cuticles and boost shine.
- Loose Styles: Opt for looser hairstyles that don't put too much tension on the extensions to maintain their integrity.
- Blending Techniques: Use curling irons or straighteners to blend your natural hair with the extensions, creating a cohesive look.
Remember, the key to beautiful tape-in extensions is to style them as if they are your natural hair while taking extra care to ensure their longevity.
Maintenance and Care
Washing and Conditioning Routines
Maintaining your tape in hair extensions is crucial to preserving their look and longevity. For washing, start by detangling the hair gently, then use a sulfate-free shampoo to clean the scalp and extensions. Work the shampoo in with soft, downward strokes, avoiding circular motions that can tangle the hair. Rinse thoroughly with lukewarm water, ensuring all soap is removed. For conditioning, apply a silicone-free conditioner to the mid-lengths and ends, steering clear of the tape bonds to prevent loosening. Leave the conditioner in for a few minutes before rinsing with cool water, which helps close hair cuticles and adds shine. Comb through with a wide-tooth comb and allow the hair to air dry, or use a blow dryer on a low heat setting if needed. These washing and conditioning routines help keep your extensions smooth, tangle-free, and firmly in place.
Sleeping and Exercise Tips
Taking care of your tape hair extensions is crucial, especially when it comes to regular activities like sleeping and exercising. Here are some helpful tips to keep your extensions looking great:
For Sleeping:
- Use a Silk Pillowcase: To minimize friction and prevent tangling, sleep on a silk or satin pillowcase.
- Braid Your Hair: Lightly braid your hair or put it into a loose ponytail to avoid tangles during the night.
- Avoid Wet Hair: Never go to bed with wet hair as this can cause the extensions to tangle and mat.
For Exercising:
- Use a Headband: Wear a headband to keep sweat away from the tape bonds.
- Opt for a Loose Hairstyle: Sport a loose bun or ponytail during workouts to prevent pulling at the extensions.
- Rinse Afterward: After exercising, give your scalp a quick rinse to remove sweat and avoid any build-up that can weaken the tape's hold.
Removing Tape In Extensions
Tools Required for Removal
To properly remove tape-in hair extensions, it is essential to have the correct tools on hand to avoid damaging your natural hair. Here's a list of tools you will need for a seamless removal process:
- Adhesive Remover: Specially formulated to break down the bonds of the tape without causing harm to your hair.
- Fine-Tooth Comb: Helps in gently detangling hair and removing any residue after the tape is taken out.
- Sectioning Clips: Utilize these to separate your hair and work on one section at a time, which makes the process more manageable.
- Hair Oil or Alcohol-Free Solution: Applying this can aid in dissolving the adhesive, making it easier to remove the extensions.
- Cotton Swabs or Pads: Perfect for applying the adhesive remover precisely on the tape bonds.
- Tail Comb: To carefully lift the extensions from the hair once the adhesive has been loosened.
- Hair Clips: To hold back the rest of your hair, avoiding any snags while working on the extensions.
Gather these tools prior to beginning the removal process to make it as smooth and efficient as possible.
The Safe Removal Process
To safely remove tape in hair extensions, gently warm the tape with a hairdryer on low heat to loosen the adhesive. Next, use a special bond remover specifically designed for tape extensions and apply it to the tape tabs. Allow it to sit for a minute to dissolve the glue. Once the bond is weakened, slowly peel the tape away from the natural hair, starting from one corner and being careful not to pull harshly. After the extensions are out, comb through the natural hair to remove any remaining adhesive residue. It's important to follow this process step by step, being patient and gentle, to prevent any damage to your natural hair.
Troubleshooting Common Issues
Dealing with Slippage
If you notice your tape in extensions starting to slip, it's important to address the issue swiftly to prevent further slippage and potential damage. Begin by calmly assessing which extensions are affected. There's no need to panic, as there are effective solutions to manage this common problem. Gently lift the slipped extension to evaluate the stickiness of the tape. If the tape has lost its adhesive quality, you may need to replace it with a new strip. When reapplying, make sure the hair is clean and free of oils or products, as these can interfere with the tape's grip. Once in place, press firmly to secure the bond. For added insurance against slippage, you can apply a specific tape-extension glue, designed to enhance the tape's adhesion without damaging the hair. If slipping persists, it's wise to consult a professional stylist who can assess the cause and provide a more personalized solution.
Managing Damage to Natural Hair
Managing damage to natural hair while using tape in hair extensions is a concern for many. To ensure minimal harm, always use a gentle approach when handling your hair. Avoid pulling or tugging on the extensions, as this can stress your natural hair. It's also crucial to apply and remove the extensions correctly, following the manufacturer's instructions. Regularly schedule maintenance appointments with a professional to check the integrity of the extensions and the health of your natural hair. If you notice any signs of damage, such as breakage or thinning, seek professional advice promptly to address the issue and avoid further harm. Additionally, nourish your natural hair by using hydrating and strengthening hair care products, and minimize the use of heat styling tools that could weaken your hair over time.
Conclusion
Final Thoughts and Recommendations
Wrapping up our guide on tape-in hair extensions, it's clear that they offer a seamless and convenient way to add length and volume to your hair. To ensure you get the best out of them, always choose high-quality extensions and have them installed by a professional if possible. To maintain their appearance, develop a careful hair care routine that includes gentle washing and conditioning, as well as appropriate sleeping and exercise habits. Remember to schedule maintenance appointments to prevent slippage and minimize damage to your natural hair. Most importantly, feel confident and enjoy the transformation tape-in hair extensions bring to your look. If any issues arise or if you’re uncertain about any part of the process, don't hesitate to consult a professional hairstylist. Invest in your hair, and it will surely pay off in the confidence and compliments you receive.

